Once you set up your printer for Google Cloud Printing, you will be able to access your printer from any location in the world and from any device (Computer, Phone, Tablet or Chromebook).
Set Up Your Printer For Google Cloud Printing
In order to set up your Printer for Google Cloud Printing you will need a Google ID (your Gmail Account) and find out whether you have a Cloud Ready Printer or a Classic printer. Most newer printer models are designed for Cloud Printing and are ready out of the box to use Google’s Cloud Printing technology. Google Cloud Print technology also works well with Classic or non-cloud printers, once they are registered with Google.
Set Up A Non Cloud Printer For Google Cloud Printing
Follow the steps below to set up a traditional or a Non Cloud Ready Printer to use Google’s Cloud Printing technology.
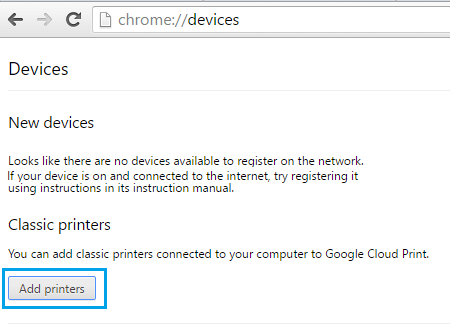
- Open the Chrome browser on your computer.
- In a new tab, visit chrome://devices
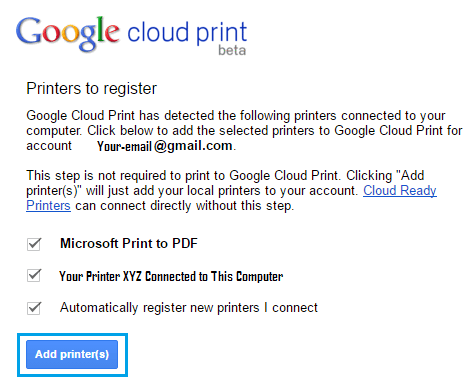
3. Next, click on the Add Printers button (See image above) – This will take you to the login page of your Google Account, in case you are not already logged in. 4. Login to your Google Account using your Gmail User Name and Password 5. Once you sign-in, you will be redirected to Google’s Cloud Print site. Any printer that is connected to your computer will be recognized by Google and listed with a tick mark.
- Just click on the Add Printer(s) button to register your Classic printer with Google. You will see a confirmation message that your printer has been registered with Google (See image below).
Once your Classic or traditional printer is registered with Google, you are all set up to print anything from anywhere to your registered printer.
Set Up A Cloud Ready Printer with Google
In case you bought your printer recently, chances are that it is a Cloud Ready printer, and it may even have registered itself with Google Cloud Print.
Open Google Chrome browser on your computer and hit the 3 bar Menu icon located at the top right corner of your screen to open a drop-down menu.
From the drop-down menu, Click on Settings (See image above)
On the Settings screen, scroll down to the bottom of page and click on Show Advanced settings link to open or expand Chrome advanced settings. (See image below)
4. Now, scroll down the page and click on the Add Printers button located under Google Cloud Print section (See image below).
5. You may be asked to login to your Google Account using your User name and Password. Once you are logged-in you may come across one of the following scenarios. A. Most likely, you will find your printer listed under My devices. This means that your printer is already registered with Google Cloud Print. You can Click on Manage to confirm that your printer is registered to use Google Cloud Print. B. You may see your printer listed under New devices. In this case click on Register and follow the instructions to register your printer with Google Cloud Print. C. It is also possible that you may not see your printer listed. In this case make sure that your printer is connected to the Network and also check the manufacturer’s website for special instructions (if any).