Allow or Block Camera and Microphone Access in Chrome
As you must have noticed, Google Chrome browser prompts you to Allow or Block, whenever a website is trying to access the camera or microphone on your computer. Depending on your response (Yes or No), Chrome will add this particular website to its Allow or Block List. Later on, you can always go back and remove the website from either Allow or Block list in Chrome browser. If you do not remove the website from “Allow” list, it will continue to have access to the webcam or microphone on your computer. The other option is to simply exit “Allow or Block” prompt. When you do this, Chrome will block the website from accessing the camera/microphone, but will not add the website to its Block List.
1. Allow or Block Camera and Microphone Access in Chrome Browser
The recommended setting in Chrome browser is to force the browser to prompt for your response or permission, whenever a website is trying to access the webcam or microphone on your computer.
Open Chrome browser on your computer
Click on the 3-dots menu icon located at the upper-right corner of your screen and click on Settings in the drop-down menu.
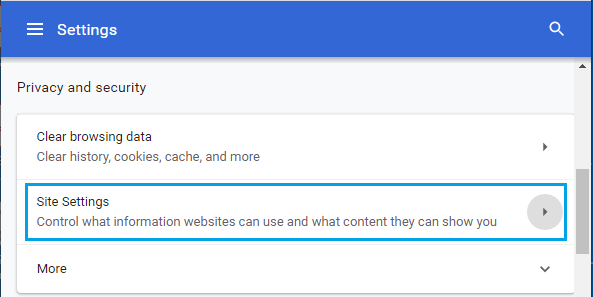
On Chrome Settings screen, scroll down to “Privacy and Security” section and click on Site Settings.
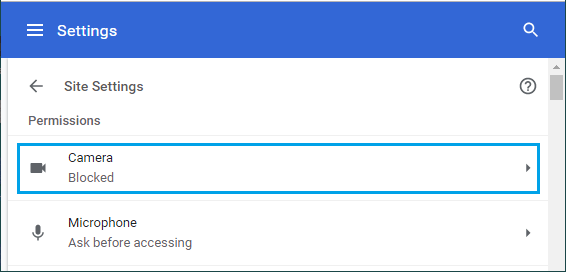
On Site settings screen, click on the Camera option.
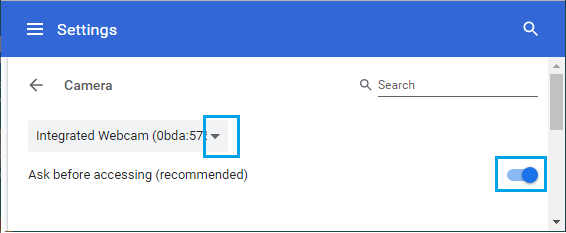
On the next screen, toggle ON the slider next to Ask before accessing (recommended).
Similarly, click on Microphone on “Site Settings” screen (see step#4) and enable Ask before accessing option for Microphone as well. After this Setting, Chrome will automatically prompt you for a response, whenever any website is trying to access the camera or microphone on your computer.
2. Block Camera Access in Chrome For Specific Websites
It is also possible to block specific web sites from accessing the webcam on your computer. This method is particularly helpful if you have already provided a website with access to the Camera on your computer and now you want to block the access.
Visit the website for which you want to block camera access.
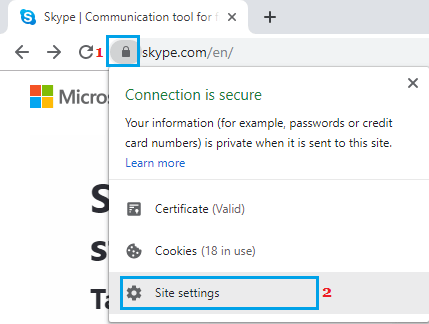
Once you are on the website, click on the lock icon located at the left side of the URL and click on Site settings in the drop-down menu.
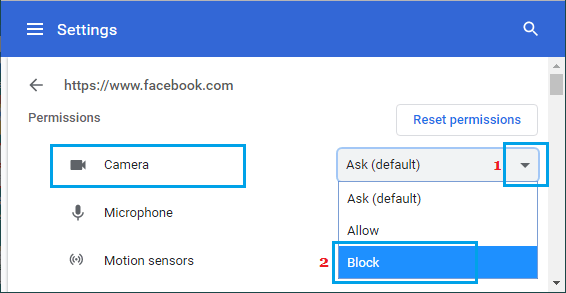
On the next screen, click on the Down Arrow next to Camera and select the Block option.
Now, this particular website will be prevented from accessing the integrated webcam on your laptop or the Camera attached to your desktop computer.
3. Block Microphone Access in Chrome For Specific Websites
Similarly, you can prevent specific websites from accessing the microphone on your computer.
Visit the website for which you want to block microphone access.
Click on the lock icon located at the left side of the URL and click on Site settings.
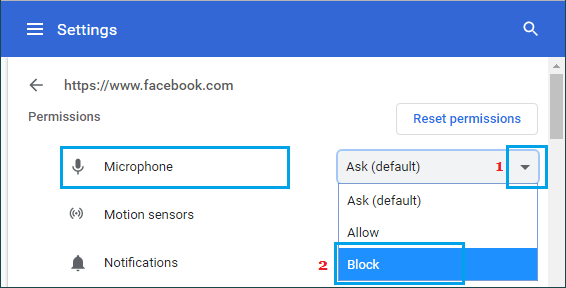
On the next screen, select the Down Arrow next to Microphone and select the Block option.
Now, this particular website will be prevented from accessing the Microphone on your computer. Chrome browser will continue to prevent this website from accessing the microphone on your computer, until you disable the setting.
How to Cast Chrome Browser to TV From Android Phone How to Automatically Clear Browsing History in Google Chrome

![]()
