However, numerous users have reported the issues of Logitech G533 Mic not working. The issue can be associated with pending driver updates, incorrect installation, or improper microphone settings. If your Logitech G533 mic stopped working too this guide is for you. We have mentioned the most effective methods for you to fix the mic headset not working issue and have an uninterrupted gaming experience.
Easy Solutions to Fix Logitech G533 Mic Not Working on Windows PC
Here are four effective ways for you to resolve the Logitech G533 mic not working, easily & quickly. However, you do not need to try all of them, just make your way through each and pick the best one for you. Now, without further ado, let’s get started!
Solution 1: Check your Microphone Settings
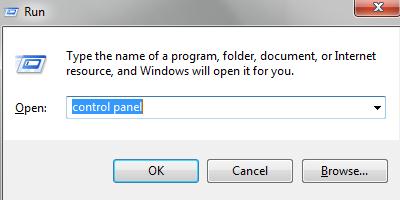
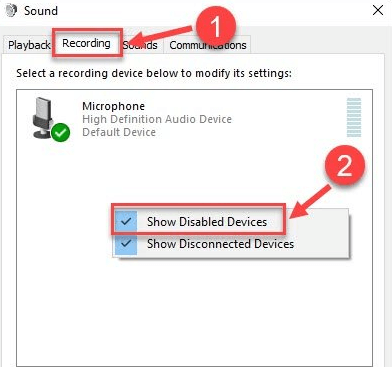
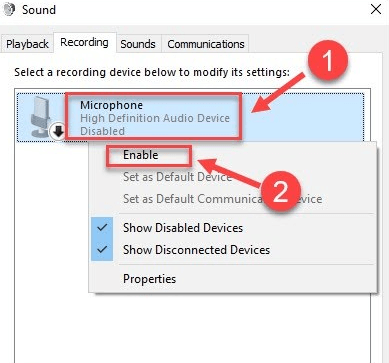
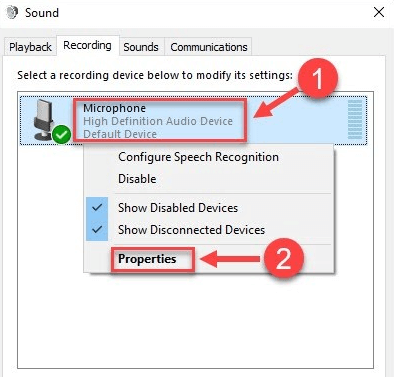
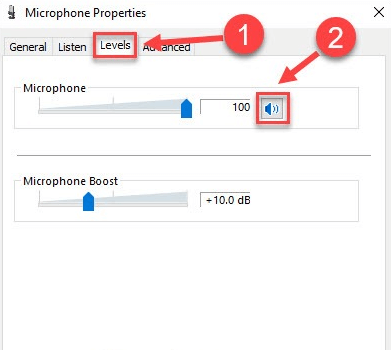
The first thing you must do in order to find and fix the Logitech G533 headset mic not working issue is to check the microphone settings. Here is how to do that: Step 1: Press Windows and R keyboard keys together to open the Run Dialog box. Then, write Control in the box and hit Enter key from your keyboard. Step 2: This action will open the Control Panel. Here, you need to set View By as Small icons. Then, navigate to the Sound and click on it to proceed. Step 3: Next, choose the Recording tab. Then, click right on any void area and select Show Disabled Devices. Step 4: If you find that your Logitech G533 mic is disabled, then right-click on it and choose Enable. Step 5: Now, just be sure that your microphone is selected as the default device. If not, then click on it and click on the Set Default option. Step 6: After that, click right on your microphone and then click on Properties. Step 7: From the next window, head to the Levels tab. Now, if your microphone is muted, then you need to unmute it by clicking on the speaker icon. Step 8: Under the Microphone, drag the slider to the left to increase the volume. Step 9: Lastly, click on Ok to save new changes. Now that your G533 gaming headset is set as the default device, plus, not muted or disabled, hopefully, it should function as expected. But unfortunately, if not, then we have got some more solutions for you. Also Read: How to Fix Logitech G935 Mic Not Working in PC
Solution 2: Update your Audio Driver
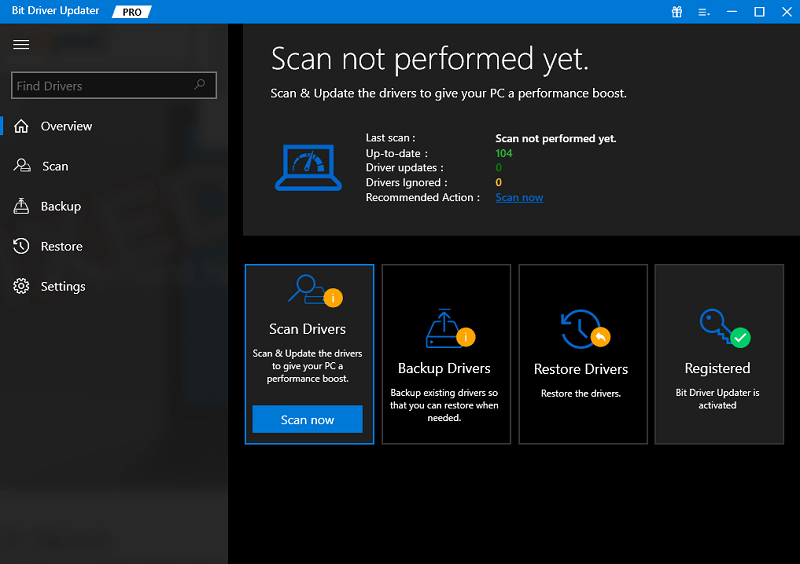
Outdated, broken, or missing audio drivers is one of the most common reasons behind the issues related to audio devices like microphones not working properly. So, if you are using the incorrect or out-of-date audio driver, then you may run into the Logitech G533 mic not working on Windows PC. Hence, to fix the issue, you should keep the respective audio drivers updated. There are mainly two simple ways to update audio drivers i.e, either manually or automatically. Talking about the manual method, then you can get the latest version of drivers on the official website of Logitech. The brand keeps releasing the drivers for their devices. So, you can search for compatible drivers and download them manually. But, this method is time-consuming and error-prone, especially if you are a newbie or a non-tech PC user. If you don’t have sufficient experience, skills, or time to update drivers manually, then you can use Bit Driver Updater to install the latest driver updates automatically with full ease. Bit Driver Updater is one of the most dedicated software and is trusted by millions of PC users across the globe. The software automatically scans your PC, finds all the problematic drivers, and provides you with new drivers. Bit Driver Updater only provides WHQL-tested and certified drivers. You can update drivers either with the free or pro version of the tool. Below is how to update drivers using Bit Driver Updater to fix Logitech G533 headset mic not working on Windows PC. Step 1: Download and install Bit Driver Updater.Step 2: Launch Bit Driver Updater and click on Scan from the left pane. Step 3: Wait for the driver utility to scan your system for faulty, out-of-date, and missing drivers. Step 4: Now, the tool provides you with a detailed list of drivers that need to be updated. Check the list, and click on the Update Now button beside the driver you wish to update. If you’re using Bit Driver Updater’s pro version, then simply click on the Update All button. This will let you update all PC drivers in one click including the audio driver. Moreover, the pro version comes with 24/7 technical support and a 60-day money-back guarantee. Now, check to see if your Logitech G533 gaming headset is working properly after the driver update. If not, then proceed with the other solutions provided below. Also Read: Logitech G27 Drivers Download and Update for Windows
Solution 3: Uninstall & Reinstall Logitech Gaming Software
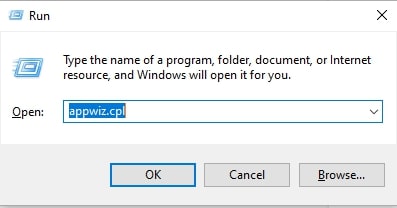
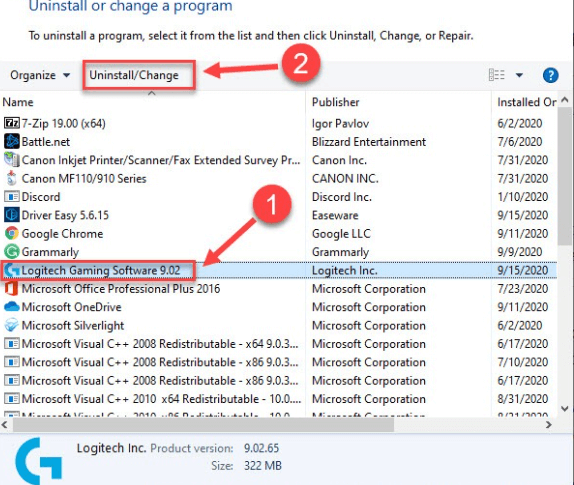
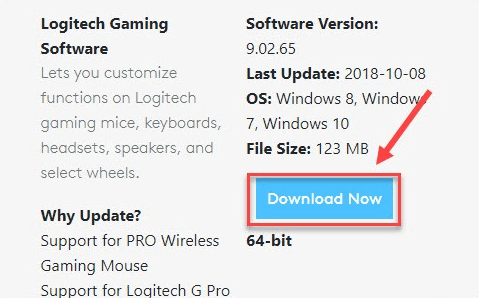
If the above solutions didn’t help you fix the Logitech G533 headset mic not working, then you can consider uninstalling and reinstalling Logitech’s Gaming software. Installing the Logitech software all over again resolves numerous bugs and other issues. So, this might work for you. Follow the procedure below for the same: Step 1: Altogether press the Windows logo and R keys from your keyboard to invoke the Run Dialog box. Step 2: Input appwiz.cpl in the text field of the Run box and then click on OK. Step 3: This action will open the Programs and Features window, here you need to locate Logitech Gaming Software and click on it. Step 4: After that, click on Uninstall/Change. Step 5: Now, follow the instructions on your screen to successfully finish the uninstallation process. Step 6: Once the program is uninstalled, then visit the official support website of Logitech. Then, search for the most recent version of the Logitech Gaming Software, which is also compatible with your operating system. And then, click on Download Now. Step 7: Once the download is complete, click double on the downloaded file and comply with the installation wizard to reinstall the program. Once everything is done, then try to re-connect the Logitech G533 gaming headset to your computer and test the issue. If still your Logitech G533 gaming headset mic not working, then try the last resort to fix the problem. Also Read: How to Fix Logitech Webcam Microphone Not Working
Solution 4: Run Audio Troubleshooter
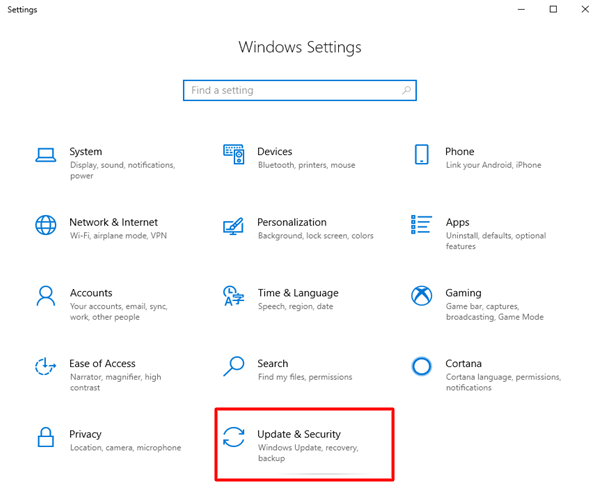
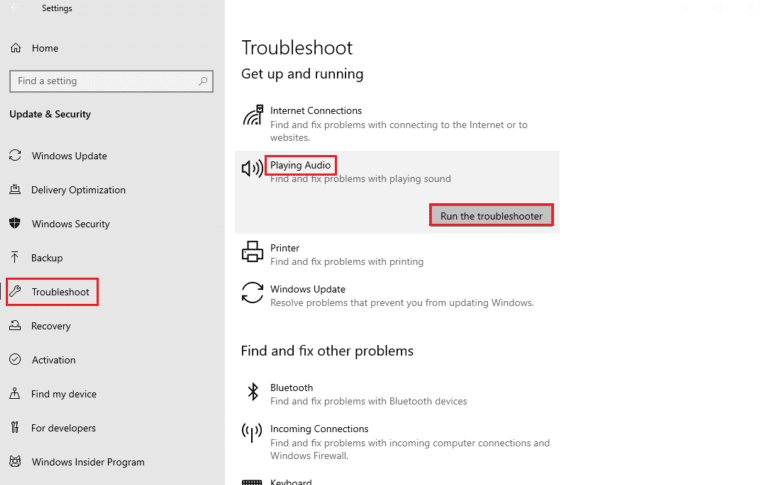
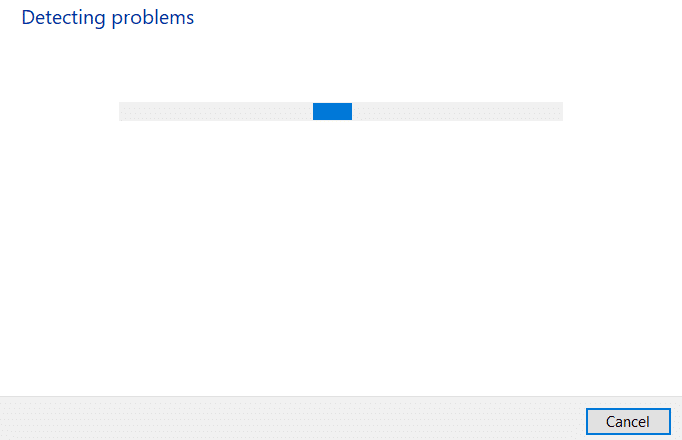
Windows PC comes with an in-built audio troubleshooting tool that helps in identifying and fixing several kinds of issues and errors related to the connected audio devices to your PC. Here is how to use an audio troubleshooter: Step 1: Open Windows Settings. Step 2: Locate and click on Update & Security. Step 3: Choose the Troubleshoot option from the left pane. Step 4: After that, choose Playing Audio and click Run the troubleshooter option. Step 5: Wait for the audio troubleshooter to find the problems. Next, follow the instructions on your screen to fix the problems. Reboot your system to apply the fixes. Hopefully, now your Logitech G533 gaming headset mic is working as expected. Also Read: How to Fix Logitech G933 No Sound
Logitech G533 Mic Not Working on PC: FIXED
So, these were some of the most effective solutions that you can consider in order to make your Logitech G533 gaming headset microphone work again on Windows 10/11. We hope you found the troubleshooting guide helpful. You can drop your queries and further suggestions in the comments section below. And, if you want to read more tech-related blogs, how-to’s, and product reviews, then you can subscribe to our Newsletter. In addition to this, you can also follow us on Facebook, Twitter, Instagram, and Pinterest.
